
Selling your used PC parts online can be a great way to make money, but one crucial detail can make or break the experience: shipping.
No matter how valuable or well-functioning your component is, if it gets damaged during transit, you’ll end up with angry buyers, returns, lost money, or even negative platform ratings.
In 2025, with more secondhand hardware being bought and sold than ever, it’s essential to know how to package and ship used PC components correctly. This guide will show you the professional way to do it—step by step.
You’ll learn:
- The best packing materials for each component
- How to label and seal packages safely
- Where to buy affordable shipping supplies
- Tips to avoid common mistakes that lead to damage or disputes
- How to choose the best carriers and shipping methods
Let’s make sure your PC part gets to its new owner safely—and that you protect yourself as a seller.
Why Proper Shipping Matters
PC components are delicate electronics, many with exposed contacts, fragile pins, sensitive circuitry, or moving parts. Even a minor impact or static discharge during shipping can cause permanent damage.
Poor packaging can result in:
- DOA components (Dead on Arrival)
- Returns or refunds
- Negative seller reviews
- Lost or denied insurance claims
- Damaged reputation on platforms like eBay, Facebook Marketplace, or Reddit
Investing 10 extra minutes into proper packaging can save you hours of headaches later.
What You’ll Need (Packing Supplies Checklist)
Before shipping, gather the following materials. You can find most of them online (Amazon, eBay, ULINE) or at local office supply stores.
✅ Essential packing materials:
- Anti-static bags (for all electronics)
- Bubble wrap or foam sheets
- Packing tape (heavy-duty)
- Zip ties or Velcro straps (for cables)
- Small ziplock bags (for screws and accessories)
- Rigid cardboard box (ideally double-walled)
- Packing peanuts or kraft paper (for void fill)
- Shipping label pouch or clear tape
Optional but useful:
- Foam inserts (for GPUs or CPUs)
- Thermal pad or sponge sheet (for padding under PCBs)
- Fragile stickers or printed labels
- Tamper-proof tape (for high-value shipments)
Component-Specific Shipping Instructions
Each PC part has unique vulnerabilities. Here’s how to protect each one properly.
🧠 CPU (Processor)
Most fragile aspects:
- Pins (on AMD chips)
- PCB corners
- Static electricity
Steps:
- Use an anti-static clamshell or CPU tray if available.
- Wrap in anti-static bag and place inside a small box.
- Add bubble wrap or foam around the CPU tray.
- Place inside a larger shipping box with void fill.
- Add a label: “FRAGILE – ELECTRONIC COMPONENT”
Tip: If no clamshell is available, cut a foam square with a small indent to hold the CPU snugly.
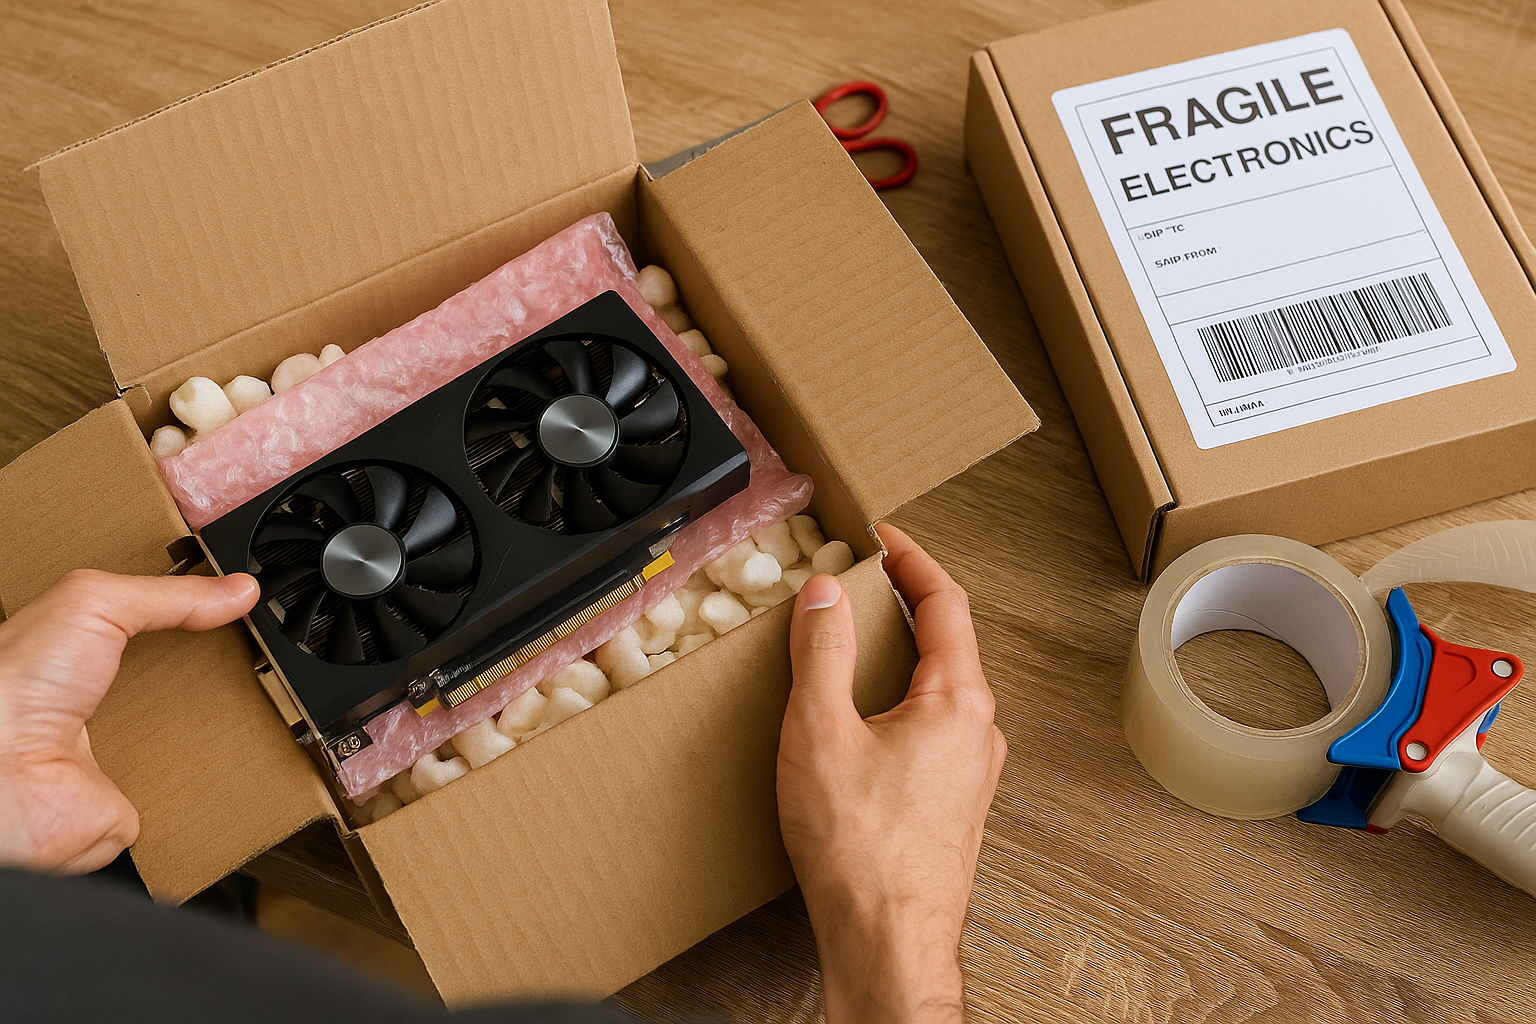
🖥️ GPU (Graphics Card)
Most fragile aspects:
- PCIe contacts
- Fan blades
- Shroud and PCB
Steps:
- Wrap GPU in an anti-static bag.
- Cover with 2–3 layers of bubble wrap or foam.
- Secure in original box if possible (best option).
- If not, place in a custom-sized box with foam on all sides.
- Use a larger outer box with 2–3 inches of packing peanuts or crumpled paper around the smaller box.
- Tape securely and label clearly.
Tip: Remove any sag brackets or extra accessories and ship them in a separate small bag.
🧠 RAM (Memory Modules)
- Insert into a RAM clamshell or wrap each stick in anti-static material.
- Use cardboard to protect the length and height.
- Secure inside a small box with padding.
- Ship in a larger padded box if shipping multiple sticks.
Important: Do not let the sticks shift around in the package.
💾 SSD or HDD (Storage Drives)
HDDs are more vulnerable due to moving parts.
Steps for both:
- Use anti-static bag for all drives.
- Wrap in bubble wrap (at least 2 layers).
- Avoid placing them directly on the bottom of the shipping box.
- Include padding under and around the drive.
- For multiple drives, use cardboard dividers or send separately.
Note: If the SSD or HDD is mounted in a bracket, remove it before packing unless the buyer wants it.
🔌 Power Supply Units (PSUs)
- Place in original box if available.
- If not, wrap in bubble wrap + cardboard.
- Tie cables neatly with Velcro or zip ties.
- Protect the fan side and plug terminals.
- Use heavy-duty box with foam padding.
Tip: PSUs are heavy—double-tape all box seams.
🧱 Motherboards
Motherboards are extremely fragile and have exposed pins, ports, and a large PCB surface.
Steps:
- Insert in anti-static bag.
- Place into original box with foam insert, or improvise a similar protection setup.
- Pad all sides evenly—avoid pressure points.
- Protect the backplate I/O area with bubble wrap or foam.
- Seal box securely, and don’t let the board slide around.
Include:
- M.2 screws, Wi-Fi antennas, backplate (if applicable), and manuals in a separate bag.
🧊 Coolers, Fans, Cases
These parts aren’t electronic, but still require proper handling.
- Wrap in foam or bubble wrap
- Protect fan blades with stiff cardboard
- Ship coolers with mounts removed and screws packed separately
- Cases should be shipped in double boxes if no original packaging
Never ship an AIO cooler with liquid still inside without original packaging.
General Shipping Tips for All Components
✅ Label Clearly
Use “FRAGILE – ELECTRONICS” on at least two sides of the box. This alerts handlers to treat the package carefully.
✅ Use Tracked Shipping
Choose services with tracking numbers, like:
- USPS Priority
- UPS Ground or Express
- FedEx Ground/Home Delivery
For high-value parts, request signature confirmation.
✅ Add Insurance for Expensive Items
If shipping a GPU over $250, insure it for the full sale price. It’s worth the extra $2–5.
✅ Photograph the Package
Take photos:
- Before sealing the box (to show how it’s packed)
- After labeling (to show shipping details)
These are your proof in case of disputes.
Mistakes to Avoid When Shipping Used PC Parts
❌ Using envelopes instead of boxes
Even small parts need rigid protection.
❌ Skipping anti-static protection
This is crucial for sensitive electronics.
❌ Letting the item move inside the box
Movement = damage risk. Pack tightly.
❌ Reusing damaged or thin boxes
Weak boxes crush easily. Use quality materials.
❌ Ignoring international customs labels
If shipping internationally, fill out customs forms accurately and label the item clearly as “USED COMPUTER PART – NO BATTERY.”
Where to Buy Affordable Shipping Supplies
If you’re selling regularly, buy supplies in bulk from:
- Amazon (multi-packs)
- ULINE
- eBay
- Staples / Office Depot
Look for:
- 6″x6″x6″ and 12″x9″x4″ box sizes (ideal for PC parts)
- Antistatic bags in 5×7″, 6×9″, 8×11″
- Bubble wrap rolls or foam sheets
You can also reuse good-quality boxes from electronics purchases—just remove or cover old labels.
Shipping From Different Platforms
| Platform | Recommended Shipping Method | Notes |
|---|---|---|
| eBay | USPS, UPS, FedEx + tracking | Always use PayPal shipping integration |
| Facebook Marketplace | Local drop-off or USPS | Prefer local to avoid scams |
| Reddit (r/hardwareswap) | USPS + insurance | Include timestamped packaging photos |
| OfferUp | In-app shipping or local | Use their prepaid labels |
Final Thoughts: Ship Like a Pro, Build Trust as a Seller
Shipping used PC parts is as important as pricing and testing. The effort you put into protecting your components shows buyers that you’re responsible, trustworthy, and professional—even if you’re just a casual seller.
Here’s your quick checklist:
- ✅ Use antistatic bags
- ✅ Wrap in foam or bubble wrap
- ✅ Choose the right box size
- ✅ Add cushioning and label clearly
- ✅ Use tracked, insured shipping
- ✅ Photograph everything before sealing
Great shipping = happy buyer + better feedback + repeat business.

Chris Dalton is a tech enthusiast with a passion for helping others build high-performance PCs on a budget. He shares practical advice, in-depth guides, and honest insights to empower freelancers, gamers, and creators to get the most out of their hardware. With hands-on experience and a focus on smart, affordable solutions, Carlos Eduardo turns complex tech into accessible knowledge for all.