
Reusing PC components can save money and reduce environmental impact, but only if done right.
Many used parts—especially those from mining rigs, dusty environments, or previous DIY builds—require careful cleaning and basic refurbishment to ensure performance and longevity.
Whether you’re flipping components for resale or integrating them into your next build, knowing how to clean and refurbish PC hardware properly is essential.
This guide walks you through the tools, safety measures, and step-by-step processes needed to clean every major component inside a PC, including what to avoid and how to test your success.
Why Cleaning and Refurbishing Used Parts Matters
Even functional used PC components can carry hidden risks:
- Overheating from dust and blocked airflow
- Corrosion or residue that leads to short circuits
- Poor performance from aged thermal compounds
- Electrical damage from static discharge or moisture
Refurbishing not only makes the parts more reliable, but can also significantly extend their useful life.
Tools and Supplies You’ll Need
Here’s a checklist of basic supplies to keep handy before starting:
- Compressed air canister or electric blower
- Isopropyl alcohol (90% or higher)
- Soft, lint-free microfiber cloths
- Anti-static wrist strap
- Small brush (e.g., clean makeup brush or electronics brush)
- Plastic-safe contact cleaner (optional)
- Thermal paste
- Screwdrivers (Phillips and flat-head)
- Cotton swabs
- ESD-safe mat (optional but recommended)
Safety First: Protecting Yourself and Your Hardware
PC components are delicate. Here’s how to clean them safely:
- Always unplug and disconnect power.
- Discharge static before touching any components by using an anti-static wristband or touching grounded metal.
- Avoid water or household cleaners—use only alcohol or electronics-approved solvents.
- Let components dry completely after cleaning with alcohol.
Never rush the process or handle components by their contact points or pins.
How to Clean and Refurbish Individual PC Components
1. Motherboard
The motherboard is central to your PC. Here’s how to clean it:
Steps:
- Remove any dust using compressed air, focusing on ports, slots, and heatsinks.
- Use a brush to gently loosen stuck-on dirt.
- Lightly dampen a microfiber cloth with isopropyl alcohol and wipe the surface carefully.
- Clean edge connectors with a cotton swab dipped in alcohol.
- Let it dry for at least 30 minutes before reuse.
Extra Tip: Use a flashlight to inspect for bulging capacitors, corrosion, or bent pins before installing.
2. CPU
Used CPUs don’t often need cleaning beyond the heat spreader and contact pins.
Steps:
- Remove old thermal paste from the top using isopropyl alcohol and a cloth.
- Clean pins (for AMD) or pads (for Intel) carefully with a dry brush or swab.
- Inspect for bent pins—straighten very gently using a credit card or tweezers if needed.
Note: Never apply liquid to CPU pins. Avoid pressing or scraping the underside of the chip.
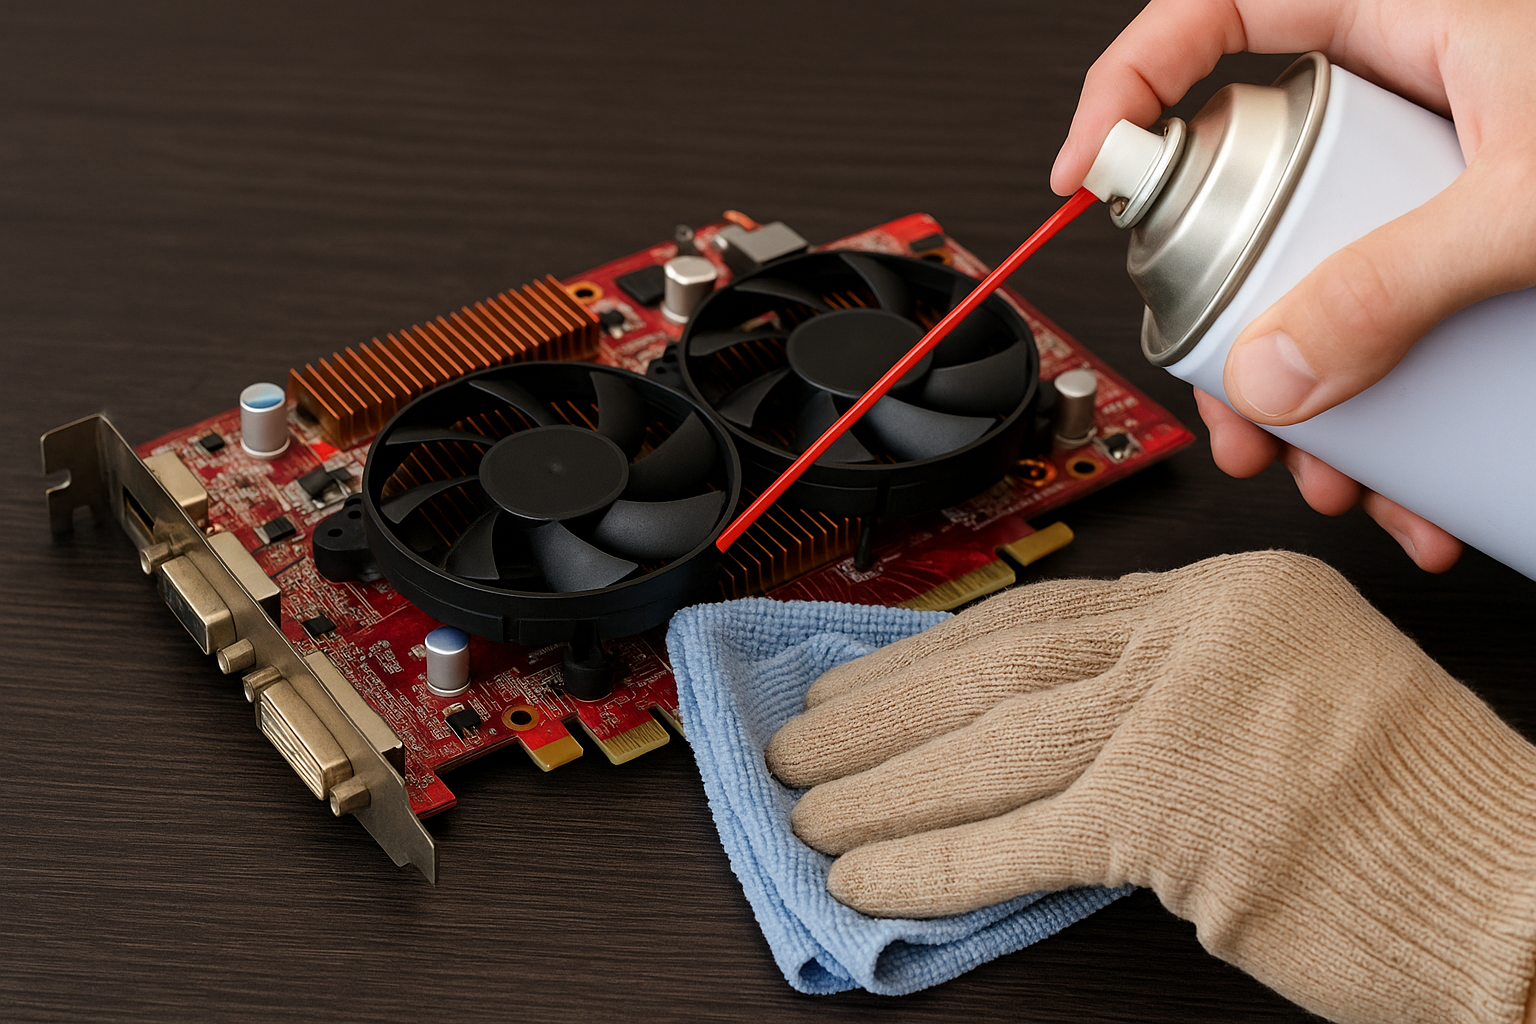
3. Graphics Card (GPU)
GPUs tend to gather dust and may run hot if not properly maintained.
Steps:
- Use compressed air to remove loose dust from the fans and heatsink.
- Disassemble the shroud (optional) to access deeper dust buildup.
- Clean the GPU die and heatsink with alcohol if reapplying thermal paste.
- Replace thermal pads if the original ones are degraded or dry.
Warning: Be cautious when removing heatsinks—some use thermal adhesive that can tear traces if pulled too hard.
4. RAM Sticks
RAM is simple to clean and generally safe to reuse.
Steps:
- Blow dust away from the modules.
- Wipe contacts with a cotton swab dipped in alcohol.
- Avoid touching the gold contacts with bare hands.
Look for corrosion or scratches along the contacts before installation.
5. Power Supply (PSU)
Refurbishing a PSU is more about cleaning and inspection—internal repairs are not recommended unless you’re an electrical expert.
Steps:
- Blow out the vents and fan grills using compressed air.
- Do not open the PSU casing—this voids warranties and risks electrocution.
- Check cables for fraying or damage.
- Test output using a PSU tester or multimeter.
If you hear coil whine or smell burning, discard the unit.
6. Hard Drives and SSDs
Cleaning storage devices is mostly cosmetic, but inspection is critical.
Steps:
- Wipe the surface with a dry or slightly alcohol-dampened cloth.
- Check for signs of impact damage, corrosion, or tampering.
- Run health checks using CrystalDiskInfo (HDD/SSD) or manufacturer-specific tools.
Avoid opening HDD enclosures—this can destroy them due to dust contamination.
7. Cooling Fans and Heatsinks
Cooling parts attract dust and should always be cleaned thoroughly.
Steps:
- Remove fans from the case or heatsinks.
- Use a brush and compressed air to remove dust.
- Wipe blades with alcohol and a cloth for deep cleaning.
- Re-lubricate the fan bearing with a drop of machine oil if it’s noisy.
For heatsinks, reapply thermal paste before reinstalling.
8. PC Case
A clean case promotes better airflow and aesthetics.
Steps:
- Remove all panels and dust filters.
- Wash dust filters with water and let dry.
- Wipe down surfaces with alcohol or all-purpose electronics cleaner.
- Clean fan grills and cable routing areas.
Ensure all standoffs, I/O shields, and front-panel connectors are intact and clean.
Advanced Refurbishing: When to Replace Parts
Sometimes cleaning isn’t enough, especially for heavily used parts. Consider replacing:
- Thermal paste on CPUs, GPUs, and chipset heatsinks
- Thermal pads on VRAM or VRMs
- Case fans if they’re noisy or wobble
- Damaged cables from PSUs or case front panels
- CMOS batteries on older motherboards
Also, firmware or BIOS updates may be needed for stability.
Post-Cleaning Testing Checklist
After cleaning, test each part thoroughly:
- Boot into BIOS to check for system recognition
- Run MemTest86 for RAM
- Use Cinebench or Prime95 for CPU stress testing
- Use FurMark or 3DMark for GPU testing
- Monitor temperatures with tools like HWMonitor or Core Temp
- Run CrystalDiskMark or SMART tests on storage drives
This ensures your refurbished components are truly ready for deployment.
Refurbishing Used Parts for Resale
If you’re reselling components, clean presentation and verified functionality help build trust.
- Take high-resolution photos from multiple angles.
- Include screenshots of benchmarks or test results.
- Be honest about wear and cosmetic flaws.
- Offer short testing windows or return options to buyers.
Trust and presentation are key to successful secondhand component sales.
Environmental and Ethical Impact
Cleaning and reusing PC components isn’t just smart financially—it’s environmentally responsible.
- Reduces toxic e-waste in landfills
- Conserves rare earth metals used in electronics
- Promotes longer product life cycles
By extending the life of your components, you’re contributing to a more sustainable tech culture.
Final Thoughts: Clean Carefully, Use Confidently
Refurbishing PC components may seem intimidating at first, but with the right tools and approach, it becomes a straightforward and rewarding process.
Not only do you save money and reduce waste, but you also gain deeper insight into the hardware you use every day.
Always take your time, inspect thoroughly, and test with care. Cleaned and refurbished properly, used components can run for years without issue—and sometimes better than they did brand new.

Chris Dalton is a tech enthusiast with a passion for helping others build high-performance PCs on a budget. He shares practical advice, in-depth guides, and honest insights to empower freelancers, gamers, and creators to get the most out of their hardware. With hands-on experience and a focus on smart, affordable solutions, Carlos Eduardo turns complex tech into accessible knowledge for all.